
The entrance door curtain poses a problem that most guides overlook: compatibility with the existing structure. Before choosing a rod or fabric, it is essential to assess the available space above the frame, the width of the passage, and the door’s opening direction. Without this prior analysis, even the best installation method will fail within a few weeks.
Compatibility of the structure and entrance door curtain: constraints to check before any installation
We recommend measuring three elements before purchasing anything: the clearance above the door frame, the depth of the wall recess (if applicable), and the lateral space. A door frame embedded in a load-bearing wall sometimes leaves only a few centimeters above the frame, which automatically excludes certain types of rods or tracks.
Recommended read : Tips and Practical Advice for a Successful Garden Year-Round
The door’s opening direction determines the side on which the curtain should be installed. On a door that opens inward, the curtain must be fixed on the room side, never on the hallway side, or it will block the door leaf. If the door opens outward, this constraint disappears, but it is necessary to check that the fabric does not rub against the interior handle.
Another often overlooked point: the presence of a glass transom or a stone surround. These configurations limit drilling options and guide towards specific fixings. On a stone frame, we always prefer a track fixed to the ceiling rather than a wall-mounted rod.
Read also : The best tips for easily maintaining and repairing your car daily
To understand how to install an entrance door curtain correctly, this step of diagnosing the structure is the most crucial.
Rod, track, or tension rod: which support for an entrance door
The choice of support directly depends on the identified constraints. Three categories stand out, each with its technical limits.
Wall-mounted rod to drill
The classic rod with screwed supports remains the most stable solution for a heavy curtain or thermal fabric. It requires a clearance of at least ten centimeters above the frame so that the supports do not obstruct the curtain’s movement. Drilling requires appropriate anchors for the wall material (plaster, brick, concrete).
Ceiling track
The ceiling track resolves most cases where wall space is lacking. It is fixed directly to the ceiling or under a lintel, freeing up the entire area above the door. This system also allows the curtain to be shifted laterally to completely clear the passage during the day. We are seeing it more and more on older entrance doors with stone framing.
Tension rod (no drilling)
Tension or adhesive rods are appealing due to their reversibility, but their durability over time remains limited. They are suitable for lightweight sheers or temporary curtains. On an entrance door used several times a day, the repeated vibrations eventually dislodge the rod within a few months. Best reserved for renters or configurations where drilling is impossible.
Choice of fabric and thermal insulation on entrance door
The use of the entrance door curtain has shifted from decorative to thermal barrier. The chosen fabric directly determines the comfort gain.
An effective thermal curtain combines several layers: a visible textile face, an insulating lining (often made of fleece or technical material), and sometimes a reflective film on the door side. The fabric weight must be dense enough to block drafts without excessively weighing down the whole setup.
Criteria to check before purchase:
- The fabric width must exceed the opening width by at least fifteen centimeters on each side to avoid lateral thermal bridges
- The length should just graze the floor without dragging; a gap of a few millimeters is enough to let cold air through
- The method of attachment to the rod (rings, pleats, eyelets) influences the weight supported and the aesthetic result
- A machine-washable fabric simplifies maintenance, especially in an entry area exposed to dust
Sheers have no insulating function. If the goal is to reduce the feeling of cold near the door, a sheer alone will be of no use.

Fixing supports and fine adjustments for a durable installation
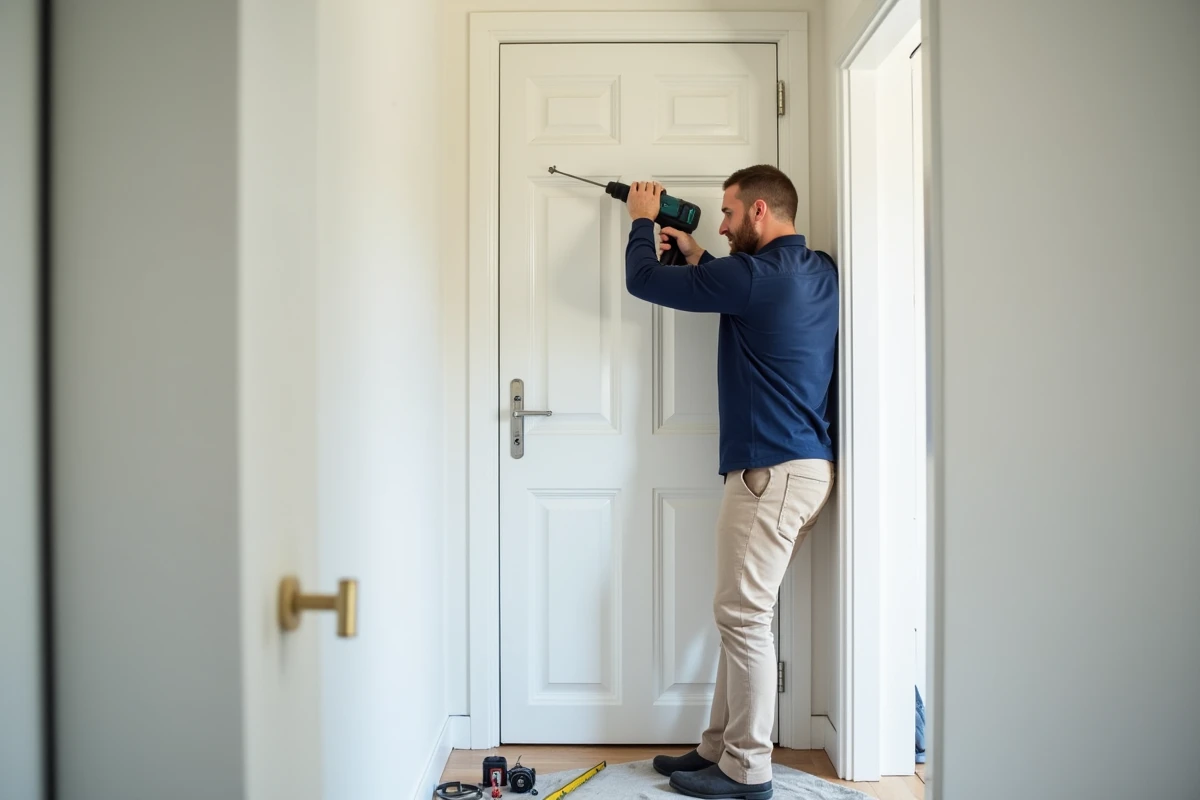
The actual installation requires few tools but demands precision in positioning. We recommend marking the exact location of the supports with a pencil before any drilling.
The supports must be perfectly level, otherwise the curtain will slide to one side due to gravity. A bubble level or a compact laser level is sufficient. On an old wall, surfaces are almost never square, which necessitates measuring from the ceiling rather than from the top of the frame.
For wall fixings, adapting the anchor to the material is a step that many neglect:
- Plasterboard or plaster: expansion anchors like Molly, capable of supporting the weight of a thermal curtain
- Hollow brick: chemical anchors or long hammer-in anchors
- Concrete or stone: standard anchors with wood screws or lag screws
Once the rod or track is installed, hang the curtain and check that the fabric does not obstruct the door’s opening or daily passage. If the curtain rubs against the door leaf, it is usually sufficient to move the supports a few centimeters towards the room.
A well-installed curtain can be operated with one hand and folds completely to the side during the day. If this is not the case, the support is likely too short or the fabric too wide for the available space. This last adjustment makes the difference between a lasting installation and a curtain that eventually gets taken down out of frustration.